
Can you build your own bedside table from old wooden planks? Definitely! I even upcycled two bedside tables for our apartment from 35-year-old oak planks. In the spirit of the Zero Waste Lifestyle even. In the end, the bedside tables even exude a real industrial charm.
In this article in the DIY Furniture Blog I would now like to show you how I planned and built the bedside cabinets. Feel free to use the instructions to build your own. Let's go!
Here is a brief overview for you:
Planning: How did I prepare the construction of the bedside cabinets?
If you want to build yourself a bedside table, you should make a plan in advance. Consider a plan. This is also basically a good rule for everything you set out to do in life 🙂 .
In the case of DIY bedside tables, you need to Answer questions about style, dimensions and material.
Style
I'm a big fan of industrial design because every piece of furniture automatically looks unique and usually is. It not everything has to be smooth, straight and exactly parallel to each other. And the material doesn't have to be brand new. On the contrary!
Instead, industrial design attaches great importance to the fact that Used items from the industry be used. That I have already used this style in our Dining table self made made the decision even easier.
Size and height
In the next step, think carefully about which Dimensions the bedside table should have. You also need to know where the bedside table(s) will be placed and how much space is available.
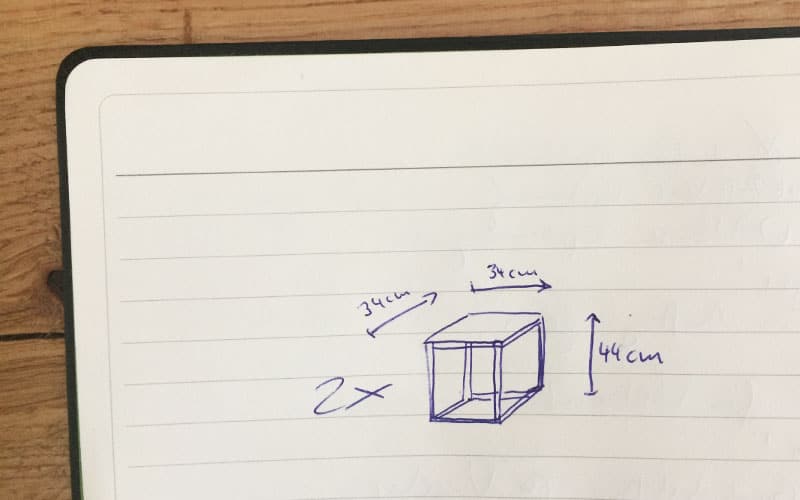
In our case, I opted for a surface area of 34×34 centimetres because that's easily enough. The height is particularly important. Depending on the height of the bed, you should simply stop how high the bedside table must be at least. Our DIY bedside table ended up measuring 44 centimeters including the surface.
Material
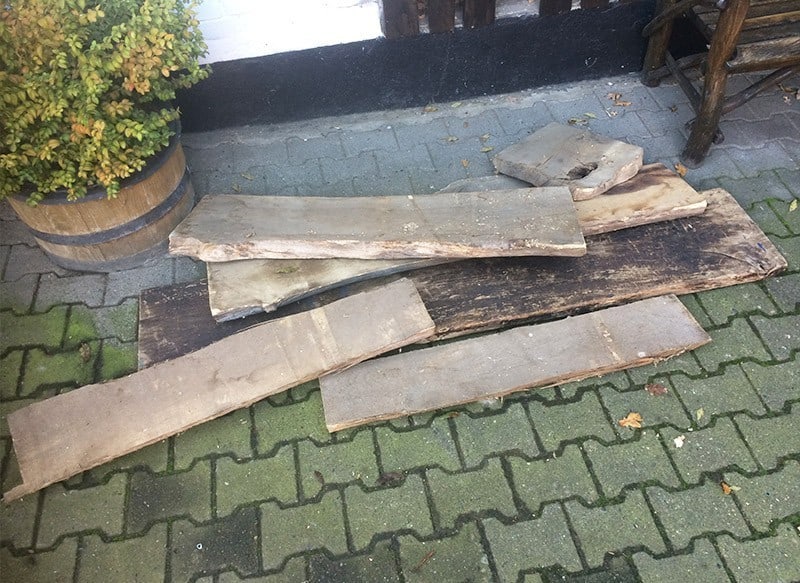
In the village there is usually a larger selection of suitable material - but even in the big city everything is basically possible. From a friend I have get old oak plankswhich had been stacked on a farm for 35 years.
I recommend you just do a little ask around in your circle of acquaintances. Alternatively, of course, you can also buy in a DIY store or order. Oak planks are available here at Obi*, for example.
The Runners of the table should be made of metal to create a nice contrast to the wood and ensure sufficient stability. I have my over eBay Classifieds and have them made to measure. But you may also be able to find good deals at Amazon*.
Instructions: How can I build a DIY bedside table myself?
Now it's time to get down to the nitty-gritty: the implementation! Fortunately, this is no problem with the self-made bedside table not that complicatedbecause the surfaces are nice and small and easy to transport and painting them doesn't take much time either.
I would like to describe it to you now, how I proceeded.
1) Clean wooden planks
If oak planks have been vegetating in a dusty, dark corner for 35 years, it is likely that the wood may be infested with worms or have other defects. Therefore, you should first check the raw material with the High pressure cleaner clean and allow to dry in a warm environment.
Also check carefully to see if there are any Nails and screws hide. Only when everything fits should you work on them with your machines or make your way to the joinery.
2) Processing wooden planks
To prevent the table from wobbling later on, the Straight surface be the same. To avoid a strange look later on, they should be (at least almost) identical on both DIY bedside tables.
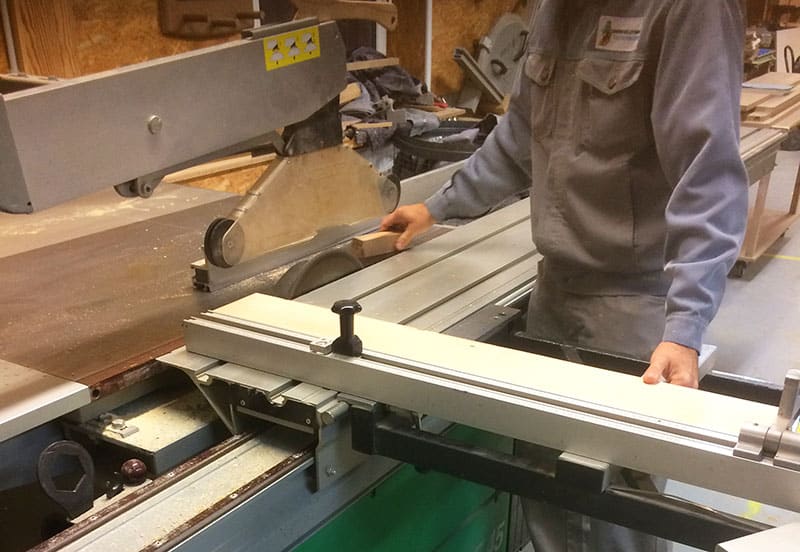
Depending on your manual skills, you can use the wood yourself. Trimming, planing and cutting to size as required - or have this work done in a joinery.
At least on one edge, however, the natural tree edge is preserved. This makes the bedside table unique.
For info: I have a carpenter friend to whom I also go, for example, the wood for my homemade coffee table have brought.
3) Sand wood smooth
Once you have the cut-outs for the two surfaces of your bedside table, you can grind. Start with a coarse sandpaper (80 grit) and then use 120 grit sandpaper for the fine sanding.
Blow the dust off the wood and wipe the wooden surfaces again with a slightly damp cloth. After a few minutes have passed, you can move on to the next step.
4) Paint wooden planks with hard wax oil.

If you want to build your own bedside table, you can of course also decide for yourself what color the surface should be afterwards. I'm a big fan of wood and would like to use the Preserve natural look.
Even if the bedside cabinet naturally remains in the home, a protective coating should still be applied, which also provides a cool shine provides.
That's why I grabbed a paint roller and painted both pieces of wood. with this transparent hard wax oil* painted. Alternatively, you can also get the oil from a DIY store.
After about 12 hours the surface of your self-built bedside table should be completely dry and ready for the next step.
5) Have metal skids made by professional
Unfortunately, I'm not a metal expert myself. To prevent the DIY bedside table from wobbling later on, I asked a reliable supplier to make the runners for the bedside tables. according to desired size to be made.
During my search, I found many suppliers who wanted just under €400 for the work and materials. That was too expensiveto be honest.
Fortunately, I am on eBay classifieds I came across someone who manufactured and sent me the two runners at a much lower price. Unfortunately, he no longer offers this service. Have a look anyway and, as I said, you might also find some good deals at Amazon*.
6) Screw surface & metal skid
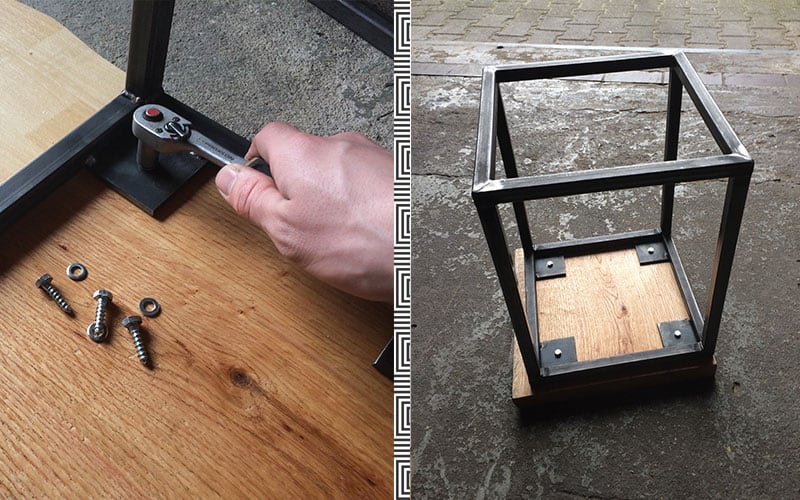
The metal runners are here and harmonize perfectly with the finished surfaces of our DIY bedside tables. I have the Frame sanded down, cleaned and coated with this clear lacquer* so that it shines beautifully.
So that Runners and table tops They still need to be screwed together to ensure that they hold together firmly in the future.
I have the appropriate Screws and washers is provided. It is important to pre-drill so that the screws do not break off when tightening. Make sure that you don't accidentally drill through the wood, otherwise the hole will end up visible on the top of your self-built bedside table.
DIY nightstand decorate and ready!
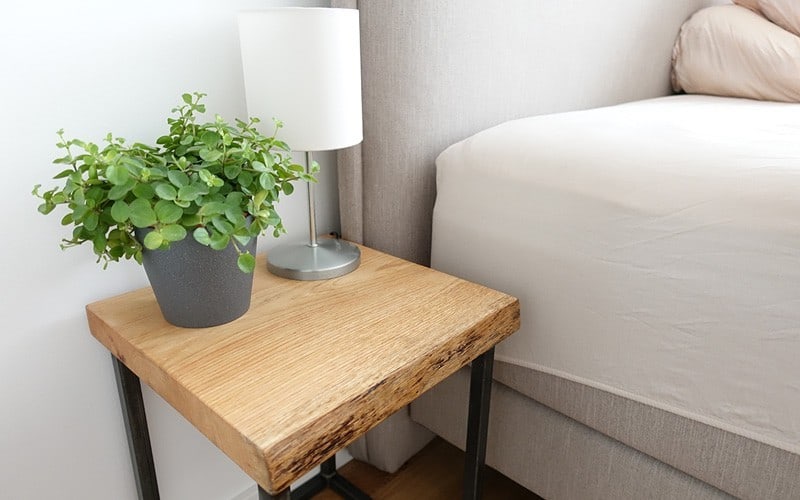
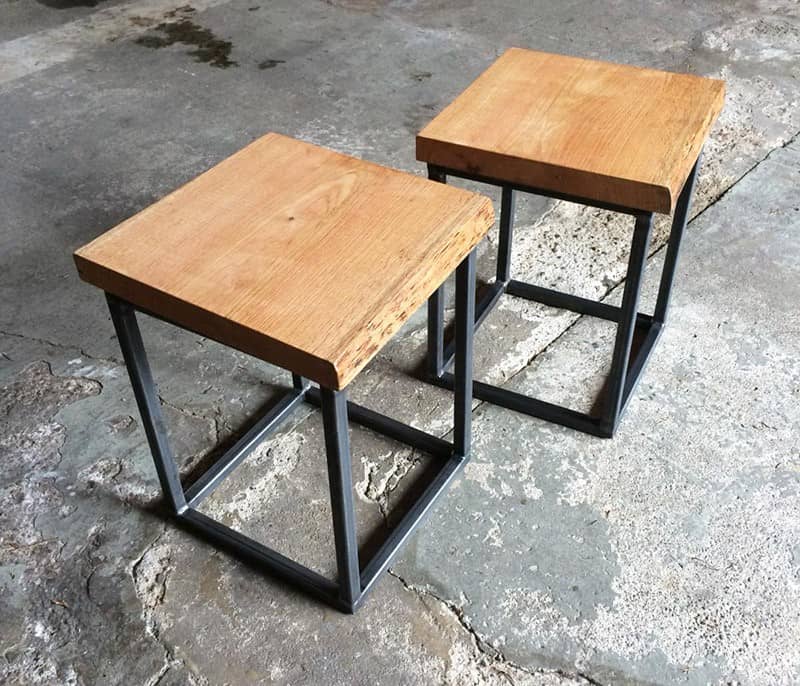
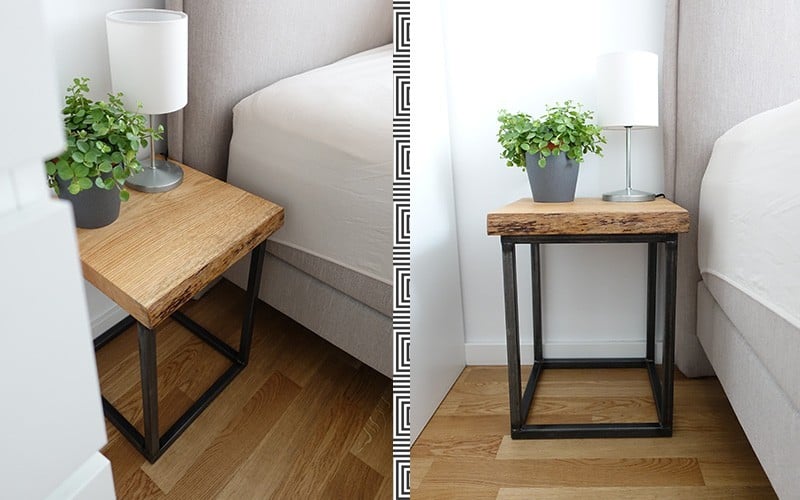
Now the bedside tables are finally finished and Ready for use at the bedside. A little decoration and of course a matching bedside lamp on top and the DIY bedside table made from old wooden planks and sturdy metal with an industrial look is ready! What do you think of the table?
Even if it is of course difficult to see now, I have placed still foam stickers so that the floor doesn't get scratched when you move the bedside table. I didn't want to keep that from you. These felt glides* I can recommend to you.
So it doesn't always have to be the big Swedish furniture store or one of the many other huge furniture stores to furnish your home beautifully. Instead you still save real money in the long term and broadens his personal horizon with regard to your own manual skills.
At the same time, we also have old, dusty oak planks a second life as a bedside table as a gift - and thus natural resources spared. Incidentally, this is also entirely in the spirit of the plastic-free lifestyle - because anyone who has ever ordered brand new furniture knows how much packaging waste is generated.
i the mental regeneration.
"Creativity is intelligence having fun."
Albert Einstein (more under Creativity Quotes)
I hope I was able to help you with these DIY instructions. Do you have any questions or suggestions about the bedside table? Then please leave me a comment.
Stay creative,

PS: Since I built this bedside table myself as part of our move, of course it didn't just stay with this one piece of furniture. In the article Build desk yourself you can see, for example, how I built my new workstation from the existing material. 🙂


Hi Christoph,
What is the dimension of the square tubes? 20mm or more?
Thanks and greetings
Dirk
Hey Dirk!
2×2 cm
Best regards
Christoph
Hello Christoph,
May I know where you got the great feet of the nightstand?
Thank you in advance.
Greeting Tobias
Hi Tobi, it's all in the text. Just send them an email 🙂 Thanks for your feedback!
Best regards
Christoph